Showing posts with label dessert. Show all posts

Sunday, 1 January 2017

Osomatsu-san Week 1: Osomatsu Pancakes

Happy New Year, readers! First blog post of 2017, so let's get straight into it!

Osomatsu is the eldest brother of the sextuplets so it only makes sense that we kick off this feature week with him! Described as the ‘leader’, he’s fond of gambling and is usually found wearing the colour red. In his Sweets set, the translation of his costume is 'Osomatsu as a pastry chef riding on pancakes. He throws a small bottle of maple syrup when he attacks.' (shout out to the lovely mods at the tumblr blog Hesokuri Wars for providing the translation)


I'd be smiling like that too if I was riding on a pile of pancakes.

That is the expression of a man that is plotting evil.

Ta-dah!

Some of my fondest memories involve pancakes: I remember watching Ma Sloth, late at night, flip tiny pikelet after tiny pikelet onto a waiting dish, to be smeared with butter and jam. (Pikelets, for my overseas readers, are basically small pancakes). It was also a common sight at birthday parties as a riff on the ever-popular fairy bread, with a pikelet as the base.

For this recipe I wanted to make ‘meatier’ pancakes, ones that are soft as pillows and soak up syrup and butter like a sponge, and I think I came pretty close with this! The recipe’s inspired by an episode of Jamie Oliver I watched when I was younger, and I’m at least 90% sure he was talking about Yorkshire puddings, but the recipe works. Dead easy, it’s all about the magic ratio: 1 cup of self raising flour to 1 cup of milk to 1 egg. That’s it. It’s never failed me (so far) and you add sugar depending on your taste. I don’t tend to add a lot, maybe 1-2 tablespoons, and I like to add a pinch of salt as well. If you’re in the mood for something fancier, try adding berries for a fruity version or, the always classic can’t-go-wrong choc chips.


I've doubled the quantities in the actual recipe because the pancakes are thicker. 

The method is a little bit more involved than what I would normally do for pancakes, but I think the extra effort makes the difference. By beating the egg whites separately, and beating the egg yolks with the sugar first, you increase the amount of air in the batter, therefore making it lighter (or so I assume). If, however, you’re a bit more strapped for time, chuck all the ingredients into a bowl (milk, egg, flour, sugar) then whisk until it’s all combined into a thick-ish batter and that’s ready to use. I don’t think you’ll get as fluffy a result, but it’ll still turn out a decent pancake.


Whip 'em good.

The mix was very frothy - think beer batter kind of froth

The solution for getting a thick pancake was simple, and it’s something I utilise for cakes – a paper collar. I’ve seen in some videos, people use cardboard milk cartons, but I didn’t have one on hand. I did think to use regular cardboard, but decided against it. A folded bit of baking paper does the job, and has the added benefit of being non-stick. Just make sure it’s properly sealed at the join, otherwise you’ll have a leaky pancake.  You’ll also want to make sure the collar isn’t too tall so you can cover the fry pan with a lid of some sorts. This way, you ensure the pancake is cooked the whole way through, so you don’t end up with a pancake that’s oozy for the wrong reasons. Also once the pancake is cooked through on one side, it becomes a lot easier to get a neat flip (and the pancake makes a satisfying ‘WHOMP’ sound when it hits the pan).


It would have been easier if I had stapled the paper together, but overlapping it works just as well.

I may have miscalculated a tad.

Maybe not a tad.

It's a lot easier if you measure it prior to putting it in the pan, in all honesty,

You want it to look like a crumpet - best cooked on low to medium heat otherwise it'll burn. 

If you're still following the script, this involves a bit of chocolate work and piping. Just make sure you pipe the decorations thick enough otherwise when you go to transfer it, it’ll break apart. Fun fact, the loopy bit of chocolate is a stylized ‘matsu’ or pine. Now, I’ve got to admit, I did deviate from the source material because I forgot which way the writing went, but all in all, I like to think I was pretty faithful to the original. Finish it off with a dollop of whipped cream, halved strawberries, blueberries and a scoop of pink coloured icecream (I went with strawberry) and there you have, your very own Osomatsu pancake stack!


Pancakes aka. syrup sponges

One day I'll temper chocolate properly. That day is not today.

It was about here I realised I had written 'Osomatsu' back to front

That being said, I'm still impressed it was legible. 

Om nom nom. 


Friday, 29 April 2016

Fan-Tasty: One Piece Gomu-gomu No Cake

Man, oh man, I've been wanting to make something like this for a while. Word of warning, this is pretty text heavy so if you're wanting to skip to the recipe/method because who even has time for that,click here . Those who read on, I salute you.

For those of you who are unfamiliar with what exactly this cake is - here's a quick rundown. One Piece is a manga series by Eiichiro Oda that started in 1997, and is still running to this day in Weekly Shonen Jump. It's been collected into eighty volumes at last count and it's still going strong. It follows the adventures of Monkey D Luffy, a 'rubber man', and his pirate crew as they sail the seas in search of the fabled One Piece, the former Pirate King's treasure that he left behind; and in this world, there exist things called 'Devil Fruit' which bestow powers on the person who eats them at the cost of them becoming unable to swim. There are different kinds of 'Devil Fruit' - such as ones that turns the user into animals, ones that give the user the ability to control elements or ones that turns the user into rubber. It's all very interesting and you can read more about the series on Wikipedia, go find all eighty volumes at bookstores or watch the first episode on Crunchyroll here.

(source) Apt name is apt.

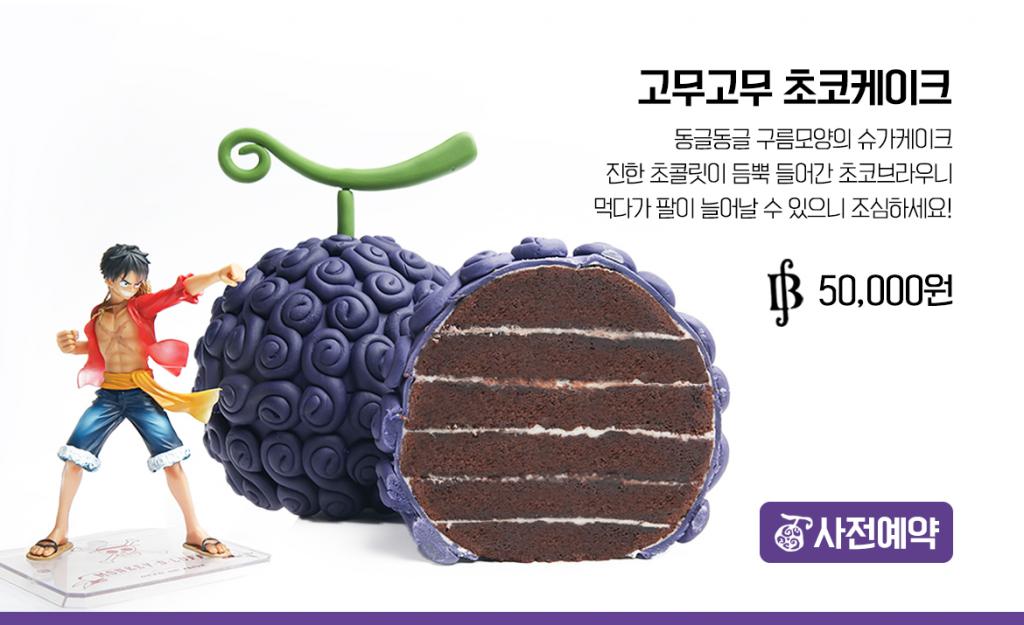
(source) The cake that started it all - Apparently it's layers of brownie cake; the orange one (Mera Mera no Mi) is cheesecake and pound cake.

    
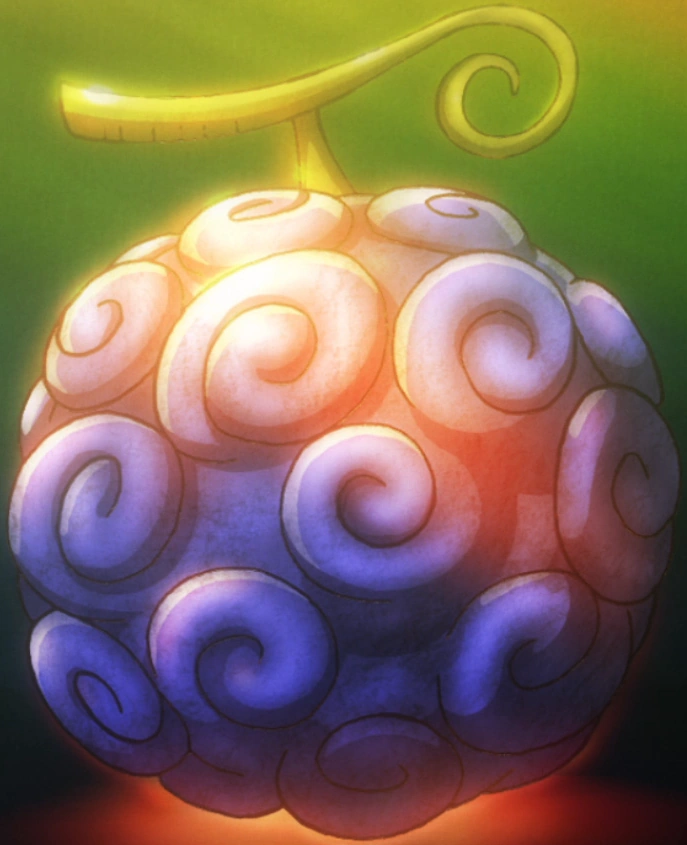
(source)  The Gomu Gomu no Mi (or Gum Gum Fruit if,
like me, you watched the English version on Cheez TV)
 
The Gomu Gomu no Cake, in all it's glory. While looking
up reference pictures for this entry, someone asked me
whilst looking at the picture above: 'Isn't that the cake
you made?' - One of the best fistpump moments I've ever had.

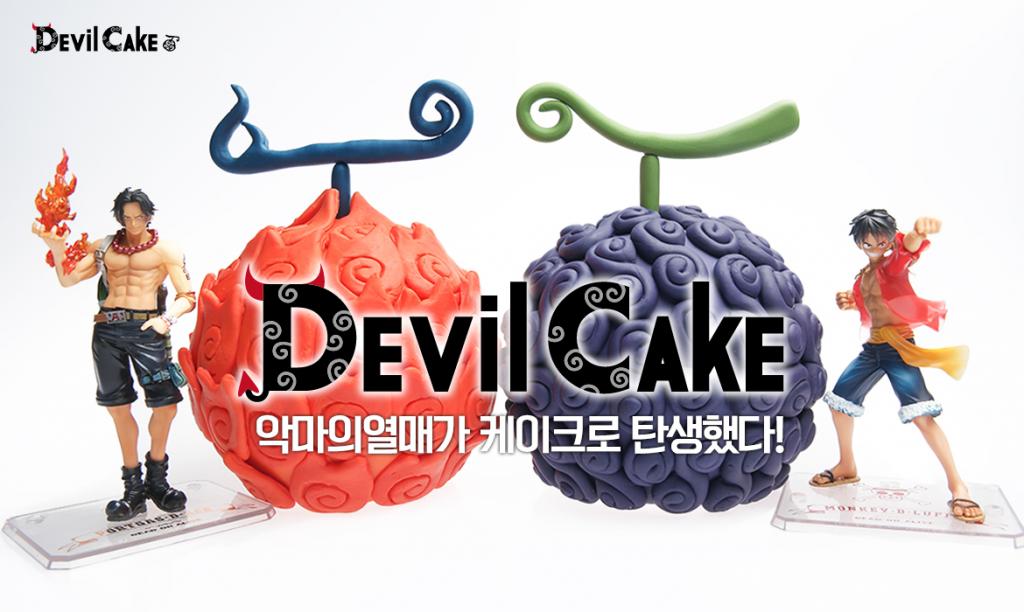
This whole thing was first inspired by an article I saw on Kotaku here about these cakes being available in Korea for a limited run; and I'm a sucker for combinations of some of my favourite things (seen here as anime and baked goods) so my curiousity was piqued. Looking at the pictures, I ran into my first (of many) hurdles. Fondant. It's not that I don't like fondant, per se, but if I can avoid it, I will. I acknowledge that there are many things you can do with fondant that just aren't possible with other icings but I still can't bring myself to cover perfectly good cake with it. Quite possibly, I've just never had good fondant. Which, led me to my second problem - sweetness.

My icing of choice for something like this where I needed to be able to pipe it was buttercream which is basically icing sugar and butter and flavouring. That's it; and for a cake of this size, having to eat that much buttercream in one go would get sickly pretty quickly. In hindsight, cream cheese icing would probably be a good alternative for the outer swirls (maybe I can make the Mera Mera no Mi out of red velvet cake next...hmm); which led me to my third problem - flavours.

The original cake is apparently layers of brownie cake; and that, to me, when coupled with the sweetness of the buttercream, would turn into a mess of sugar. Which although not neccessarily a bad thing was not what I was after.Some of the highlights of my thought process were 'lemon and rosemary cake and earl grey buttercream' and 'coffee and blackberry and whiped cream filling' but I decided to keep it simple, at least for a first attempt, and I went with a coffee flavoured sponge and a chocolate sponge in the hopes that the bitterness of the coffee would balance the sweetness of the sugar. To try and make it more palatable, I decided to go with a coffee buttercream for the inner layers and the outer swirls was a vanilla buttercream. All in all, wasn't bad - was still very sweet but the coffee aftertaste helped.

Once that was all sorted out, the fourth problem reared its ugly head. How do you make a spherical cake without a spherical cake tin? This was the question I asked myself (and Google) and the first, brilliant solution was 'Make two half-sphere cakes, then sandwich together,' on the off chance you have a hemispherical cake tin lying around. I am not one of those people. Looking at the original cake, you can see they've done it in layers so I decided to do something similar. I decided on concentric circles that, once stacked, would magically form a ball shape and got to work. Stand back, we're going to try maths!

Maths.
I decided to wing it instead and eyeball the cake into submission. First I made the sponges in a baking tray to ensure I got the maximum area (which gives you a bit more wiggle room when cutting). Once that was done, I left them aside overnight to cool. Potentially, you could make this in one day if you start the sponges early enough and you use a fridge to expedite the cooling process. Next, I came across the fifth problem, circles. I don't have that much confidence in my knife ability that I can cut a perfect circle freehand so I found a ramekin, a small bowl, a round yogurt lid and a bigger bowl. Innovation is key!

Does anyone remember that tongue twister about making bitter batter better with better butter?
Make sure you have enough cake for the circle with the biggest circumference!

Looked good when it was all separate but...

"Are you making a honeypot cake?"
 Not the most spherical sphere, much to my disappointment. Not to be deterred, I decided to see if a crumb coating would add any improvement. This step's pretty easy, just spread a layer of coffee buttercream in between each layer and build up your cake, then cover the whole thing in a thin layer of icing. Note that it might slide around as you build up the layers, but they can be easily pushed back into place with none the wiser. After the crumb coat had set after about ten minutes in the fridge, it was time to practice my knife skills. I'm sure there's an actual professional way to do this, but I just shaved the sides down until it looked like a sphere. It definitely helped that the cake was hard though, I can only imagine it'd be ten times harder with the layers sliding all over the place - so don't skip the refrigeration step!

Disappointingly enough, the crumb coat did
not magically turn it into a perfect sphere
After carving, it looked so much better - just use
a sharp knife and whittle that cake!

Once it's ball-like enough for you, crumb coat with purple icing then in the fridge it goes; then once that's set, you can apply a thicker layer and then it's on to the fun part. Now, I'm a fan of buying things only they're absolutely, positively neccessary and piping bags fall squarely into that category because I figure I can use a ziplock or freezer bag to the same effect more-or-less. However, last Christmas I was blessed with the gift of disposable piping bags, so I decided to treat myself and use one. Straight away, it was a lot easier to pipe but I think I made the hole a bit too big and my swirls didn't turn out quite as planned. So back to the freezer bag I went, and although slightly more cumbersome to hold, I got a better result. Moral of the story - practice does make perfect.

Once you're satisfied with how it looks, pop it back in the fridge and you can get working on the stem. I definitely remembered the stalk being green but didn't feel up to experimenting with food colouring and white chocolate. Fun fact, did you know you can buy pre-coloured icing/chocolate in tubes - and they have flavours? Mind blown that day in the baking aisle. Of course, I didn't have those on me at the time so I went with dark chocolate; and this is where my perfectionist streak metaphorically gut-punched me. The first time I did the stalk, I was pretty happy until I nudged it accidentally in transit to the fridge. Easily fixed, a bit of scraping and I ended up with a far thicker stalk than intended. Third time's the charm, as they say.

Only, not quite so in this case. I took it out of the fridge a few minutes later, only to see that the chocolate had spread out. Maybe it'll look okay when I stick it into the cake, I thought.

It didn't. I spent a good minute looking at it and thinking 'That looks okay,' but, well, the picture doesn't lie. Fourth time lucky! I melted it down and tried again, and failed again. Third Fifth time's the charm, as they say. With all the focus and steady hands of a neurosurgeon, I finally managed the perfect stalk and I'm so glad I did. In the immortal words of Ron Swanson: "Never half-ass two things. Whole ass one thing."

Triple batch of icing, ready to go!

The crumb coat enables a really clean second layer.

Primary school flashback to space dioramas. Mine was on Mars.

Swirls upon swirls upon swirls.


Yeah, looks just as bad as I remember it looking
Slices just like a rockmelon. Now, who's up for a swim?

Tuesday, 1 March 2016

You're the Apple (Pie) of my Eye

Let's kick off the first post of the new year with a bit of word association: apple...what does that make you think of? I'm guessing 'pie' would be pretty high up there in the responses, and it's what I think of first. Flaky, buttery pastry and sweet, velvety-soft apple-y insides, served with a side of icecream and/or custard - I'm in heaven! Best of all, apples are available all year round so pie's never too far away! Also apologies in advance for the lack of photographic how-to-do but luckily a very good friend had their phone at the ready so all credit to them!

According to Wikipedia, there's three broad classifications of pie, all depending on the whereabouts of the crust e.g. top, bottom or double. Top refers to a pie where there's only a pastry lid on top of the filling in the dish - which incidentally was the most common way of making pies in the recipe books that I looked over. Bottom means there's pastry on the base but not on the top...essentially an open pie, if you like. Although, if you think about it, couldn't it also be called a tart? Double or two crust, as it's also known, is as its name suggests, a pastry lid and bottom fully encasing a filling. This type is the one I think of when I picture pie but which one do you guys think of?

This recipe has been adapted from one of Jamie Oliver's who, I'm sure, needs no introduction. One of the most well known celebrity chefs, his stance on healthy eating has garnered a lot of support. This recipe on the other hand, is not the most healthy but it's definitely delicious, so eat in moderation and maybe follow it up with a 5 kilometer run and salad for a week. I also found that it makes more pastry than needed, so save those trimmings! You could probably stretch the remainders to make a tart case that can be filled with any manner of things: marscapone lightened with fluffy, whipped cream dotted with raspberries tossed with lemon juice and a dusting of icing sugar springs to mind; or maybe a creamy, eggy, cheesy quiche with mushrooms and onion would be more to your tastes; or maybe go for the traditional meat pie with juicy mince and chunky gravy. I managed to stretch the remaining pastry to make a tarte tatin (an upside down apple tart) and the results were extremely satisfying. Happy tummies all round!


Golden brown crust - check 

Creamy and crisp and oh-so-good

Sunday, 18 October 2015

Ghibli Week 7: Spirited Away Steamed Buns

As we reach the end of this gastronomical (and very prolonged) journey, it's time for a bit of R&R and what better place to relax than at a bathhouse? Spirited Away (千と千尋の神隠しwas released in 2001 and was the first Ghibli movie I ever watched. An engrossing story with an equally incredible soundtrack, it's little wonder that even to this day, it is the highest grossing film in Japanese box office history (as per Wikipedia). 

Food plays an integral part in Spirited Away; the parents are turned into pigs after eating the food meant for the spirits, Chihiro almost fades into nothingness until she eats something from the spirit world, the dumpling the River God gives her plays an important role later in the movie and that's just scratching the surface. The food choices I could've tried to recreate in this movie are endless but to wrap it up, I've chosen something very near and dear to my heart: the pau (or steamed bun) that Chihiro eats after a long day of working at the bathhouse.

A staple of dim sum restaurants everywhere, they're easily recognisable by their fluffy white exteriors encasing salty-sweet chunks of roasted pork (usually) but it's not uncommon to find them with varied fillings such as red bean, black sesame or salted egg custard. For these, I used a can of ready-made red bean paste (which can be found at Asian grocery stores) and I made a couple of savoury ones too.

With this one I cheated a little bit and used a package, similar to the box cake mixes, for time constraints so no recipe I'm afraid. If you've already got a solid recipe under your belt, feel free to go ahead and use that, I'm sure the end result will be the same! I think what's most important in this recipe is the kneading; you want to achieve a smooth, elastic dough in order to get the best texture and look from your pau, plus you'll get killer arm muscles so win/win; but beware of overkneading the dough otherwise they'll become tough and chewy, instead of fluffy and soft. I found the hardest part about this was folding the buns... and rather than me trying to explain how to do it, here’s a video which is pretty easy to follow, even if you can't understand Mandarin. Don’t worry about making mistakes when folding though because you can just turn it over so the folds are on the bottom and you’ll have a smooth bun, just like the ones in the movies!

So just to wrap up: massive thanks to everyone who's stuck it out, you guys are awesome. I might revisit Studio Ghibli in the future, but for now- I declare Ghibli Week officially OVER!

Available from Asian grocery stores

The contents of the bag - just add water

The savoury ones with the pleating action
Not as big as Chihiro's but still good
Savoury ones

(source) om nom nom
Happy slothing!

xx

Sunday, 6 September 2015

Ghibli Week 6: The Borrower Arrietty's Peanut Butter and Jam Thumbprint Cookies

This post we shrink down in size and visit The Secret World of Arrietty (借りぐらしのアリエッティ). Based on the novel, ‘The Borrowers’ by Mary Norton, it follows a young boy’s discovery of the hidden world of the Borrowers, tiny people who live within the walls of his mother’s childhood home. Accompanied by a gorgeous soundtrack by French musician Cecile Corbel, you can listen to the theme song here.

(source) 

Now astute readers may be going 'Hey, wait a minute, you never said anything about doing Arrietty in your Ghibli Week run down', but after giving it some thought, I couldn't go past this movie especially since I adore the soundtrack. So without further ado, let's get to the recipe!


Blink and you'll miss the cookies in this scene.
It's peanut butter jelly time, peanut butter jelly time!

Thumbprint cookies or jam drops, I know these as 'those cookies with a bit of jam in the middle'. As you can tell, I'm probably not the most creative at naming things. I decided to make the cookie peanut butter flavoured because winning combination right there. To those with peanut allergies, please accept my apologies but these would be equally as good if you used shortbread instead. Hmm, that gives me an idea for a future post...This recipe's super simple as well and can easily be whipped up for afternoon snacks. Make a cup of your preferred tea or coffee and enjoy!


Vanilla bean paste or vanilla extract - whatever's on hand

Whipped until light and fluffy

Eventually you end up with this - it's quite soft and it's kind of got the consistency of icecream

Nut balls *snickers*

Flatten them slightly and...

Boop! Thumbprint cookies.

Wham, bam, there's the jam.

Related Posts Plugin for WordPress, Blogger...