Sunday 1 January 2017

Osomatsu-san Week 1: Osomatsu Pancakes

Happy New Year, readers! First blog post of 2017, so let's get straight into it!

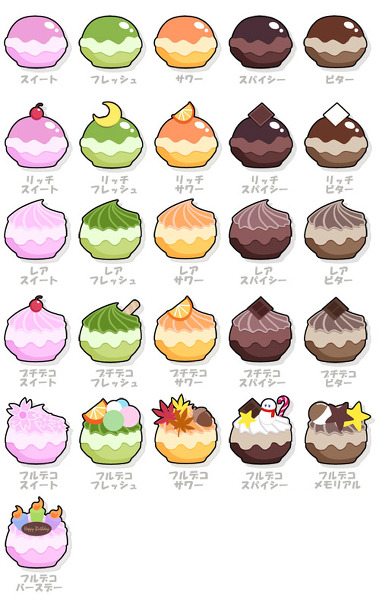
Osomatsu is the eldest brother of the sextuplets so it only makes sense that we kick off this feature week with him! Described as the ‘leader’, he’s fond of gambling and is usually found wearing the colour red. In his Sweets set, the translation of his costume is 'Osomatsu as a pastry chef riding on pancakes. He throws a small bottle of maple syrup when he attacks.' (shout out to the lovely mods at the tumblr blog Hesokuri Wars for providing the translation)


I'd be smiling like that too if I was riding on a pile of pancakes.

That is the expression of a man that is plotting evil.

Ta-dah!

Some of my fondest memories involve pancakes: I remember watching Ma Sloth, late at night, flip tiny pikelet after tiny pikelet onto a waiting dish, to be smeared with butter and jam. (Pikelets, for my overseas readers, are basically small pancakes). It was also a common sight at birthday parties as a riff on the ever-popular fairy bread, with a pikelet as the base.

For this recipe I wanted to make ‘meatier’ pancakes, ones that are soft as pillows and soak up syrup and butter like a sponge, and I think I came pretty close with this! The recipe’s inspired by an episode of Jamie Oliver I watched when I was younger, and I’m at least 90% sure he was talking about Yorkshire puddings, but the recipe works. Dead easy, it’s all about the magic ratio: 1 cup of self raising flour to 1 cup of milk to 1 egg. That’s it. It’s never failed me (so far) and you add sugar depending on your taste. I don’t tend to add a lot, maybe 1-2 tablespoons, and I like to add a pinch of salt as well. If you’re in the mood for something fancier, try adding berries for a fruity version or, the always classic can’t-go-wrong choc chips.


I've doubled the quantities in the actual recipe because the pancakes are thicker. 

The method is a little bit more involved than what I would normally do for pancakes, but I think the extra effort makes the difference. By beating the egg whites separately, and beating the egg yolks with the sugar first, you increase the amount of air in the batter, therefore making it lighter (or so I assume). If, however, you’re a bit more strapped for time, chuck all the ingredients into a bowl (milk, egg, flour, sugar) then whisk until it’s all combined into a thick-ish batter and that’s ready to use. I don’t think you’ll get as fluffy a result, but it’ll still turn out a decent pancake.


Whip 'em good.

The mix was very frothy - think beer batter kind of froth

The solution for getting a thick pancake was simple, and it’s something I utilise for cakes – a paper collar. I’ve seen in some videos, people use cardboard milk cartons, but I didn’t have one on hand. I did think to use regular cardboard, but decided against it. A folded bit of baking paper does the job, and has the added benefit of being non-stick. Just make sure it’s properly sealed at the join, otherwise you’ll have a leaky pancake.  You’ll also want to make sure the collar isn’t too tall so you can cover the fry pan with a lid of some sorts. This way, you ensure the pancake is cooked the whole way through, so you don’t end up with a pancake that’s oozy for the wrong reasons. Also once the pancake is cooked through on one side, it becomes a lot easier to get a neat flip (and the pancake makes a satisfying ‘WHOMP’ sound when it hits the pan).


It would have been easier if I had stapled the paper together, but overlapping it works just as well.

I may have miscalculated a tad.

Maybe not a tad.

It's a lot easier if you measure it prior to putting it in the pan, in all honesty,

You want it to look like a crumpet - best cooked on low to medium heat otherwise it'll burn. 

If you're still following the script, this involves a bit of chocolate work and piping. Just make sure you pipe the decorations thick enough otherwise when you go to transfer it, it’ll break apart. Fun fact, the loopy bit of chocolate is a stylized ‘matsu’ or pine. Now, I’ve got to admit, I did deviate from the source material because I forgot which way the writing went, but all in all, I like to think I was pretty faithful to the original. Finish it off with a dollop of whipped cream, halved strawberries, blueberries and a scoop of pink coloured icecream (I went with strawberry) and there you have, your very own Osomatsu pancake stack!


Pancakes aka. syrup sponges

One day I'll temper chocolate properly. That day is not today.

It was about here I realised I had written 'Osomatsu' back to front

That being said, I'm still impressed it was legible. 

Om nom nom. 


Sunday 25 December 2016

Fan-tasty: Osomatsu-san Hesokuri Wars Sweets Week

You know what we haven't had on this blog for some time? We haven't had a special feature since Ghibli Week. With the end of the year quick approaching, there's not that much time left to squeeze one in there, so I'll go out with a bang! Earlier this month, a new episode of an anime I was fond of was released as a collaboration with JRA (or the Japan Racing Association). Yes, it's an Osomatsu-san feature! (I say week as a guideline only because I will more than likely live up to my blog name)

Osomatsu-san, or Mr. Osomatsu (おそ松さん) is a gag anime released late 2015, which was based on an earlier anime, Osomatsu-kun (おそ松くん), which was based on a comedy manga strip of the same name which was serialised from 1962 to 1969. Trust me, it'll all make sense.

(source) Osomatsu-kun 
(source) Osomatsu-san


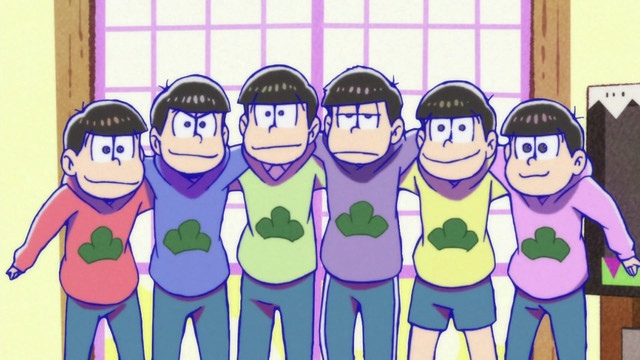
Osomatsu-kun was written by Fujio Akatsuka who is considered to be one of the most successful gag manga writers, and the series follows the exploits of the identical sextuplet brothers (in birth order): Osomatsu, Karamatsu, Choromatsu, Ichimatsu, Jyushimatsu and Todomatsu. A running gag in the manga was the inability of the characters to tell the brothers apart. Later in the manga, the series begins to revolve around supporting characters due to their popularity. (read more about it here

Skip ahead to 2015, which would've been Fujio Akatsuka's 80th birthday, and the sextuplets are all grown up. Osomatsu-san is set roughly 10 years in the future from Osomatsu-kun (except in a modern setting), the brothers have grown up into NEETs (Not in Education, Employment or Training) and each has a more defined personality.


(source) From left to right: Osomatsu, Karamatsu, Choromatsu, Ichimatsu, Jyushimatsu, Todomatsu 

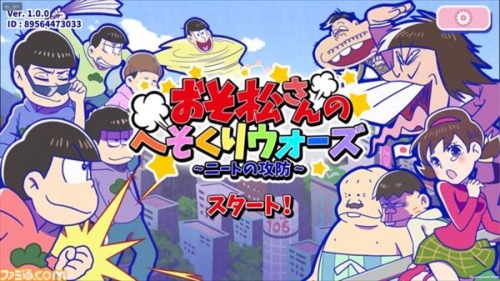
There are several tie-in games, one of them being おそ松さんのへそくりウォーズ~ニートの攻防~ which is somewhat translated to Osomatsu-san Money Wars~ When NEETs Attack~, but is better known as Hesokuri Wars. (if someone who knows Japanese can translate this better, please let me know in the comments!) The game is styled like a tower defense game, where you send your army of sextuplet brothers towards the opposing base whilst simultaneously defending your own. A large part of what keeps me playing this game is the availability of different costumes for the characters, available through a 'gatcha' system. 


(source) This game is absolutely terrible and I love it so much. 

If you've ever been to Asia, more than likely you've seen a gatcha machine, or capsule machine (or gashapon/gachapon), which spits out a toy in a plastic ball-like container when you feed it a coin. (they can also be found in some shopping centers over here). It's completely random, which when applied to a game where you have to spend limited in-game currency to 'roll' the gatcha, can end up being extremely frustrating. With six main characters each having a unique costume based on a theme, these are known as a 'set', and the theme ranges from their normal appearance, to specific episode skits, to riffing on magical girls, to the current in-game event of 'dark santas'. 


(source) Must. Collect. Them. All.

One such set is the Sweets Set, where the brothers are dressed up as chefs with their own unique desserts, and yes, you've probably guessed by now, I'm going to recreate all of the desserts that you see before you! And even better news, I've covered all the context in this post, so we can get straight to the good stuff in the main ones! Just in case the pictures aren't loading, this is what you can expect:
  1. Osomatsu's Pancakes
  2. Karamatsu's Float
  3. Choromatsu's Cheesecake
  4. Ichimatsu's Mousse
  5. Jyushimatsu's Parfait
  6. Todomatsu's "Fromage"
(I'm about 99% sure that fromage is cheese, so I'm going to use artistic license with that one.)

Happy slothing!!

xx

Osomatsu-san Money Wars ~When NEETS Attack~

Osomatsu-san Money Wars ~When NEETS Attack~


Friday 18 November 2016

Fan-tasty: Poke-rice-balls

"I wanna be the very best, like no one ever was."

This signalled the beginning of what was to become such a big part of my childhood. Pocket Monsters, or as it's more widely known as Pokemon, recently celebrated it's 20th anniversary of the release of the original games, Red, Green and Blue on the Game Boy. In those twenty years, it's become a globally popular franchise that spans video games, comics/manga, animated movies and television shows, trading cards and toys, and most recently, a mobile augmented reality game, Pokemon Go. Now up to the seventh generation of Pokemon, the newest games, Pokemon Sun and Pokemon Moon are set to release 18th November.

My hype is real. Thank you to my friends for putting up with my excitement in this week lead up. Also I am fully aware there's an accent over the 'e' in Pokemon. Humour me and pretend there's an accent every time I mention something Pokemon related. (source)

(Also on a somewhat related note, in the past few weeks, Nintendo released some details about it's upcoming console (the Nintendo Switch) which should be pretty interesting.)

Quick run-down of how the Pokemon games work if you're in the proportion of the population that've never played Pokemon before. Basically, you travel the region collecting Pokemon and battling other Pokemon trainers in-game and via the online system. There's many different ways of approaching the game, and people have devoted hours upon hours working out the best strategies to beat the game.

Of all the items available in the game, probably the most well known of them is the iconic Poke Ball which is used for housing your Pokemon team. In later generations, items based on food were added: Berries, which could be blended together to make PokeBlocks and later, Poffins; Lava Cookies which resemble rice crackers; Apricorns which were used to make specific Poke Balls depending on their colour; and Poke Puffs which are a recent addition to the series.

It's one of my dreams to make every one of these Poke Puffs(source)

Crossing over to reality, there are many examples of food inspired by Pokemon (the ones that come to mind are charaben or character bento, often elaborately designed boxed lunches to resemble people or pop-culture icons; a series of cocktails you can find here, or at one Sydney cafe which, for a limited time, had Pokemon burgers here). I decided to take a page out of the bento book and go with a staple: the humble rice ball or onigiri.

I'll save my ode to rice for a later post, but basically rice can be classified into three broad categories: long, medium and short. This particular recipe uses medium grain rice, because the stickiness of the grains allow for easier shaping and less chance your rice ball will fall to pieces. I used a spherical ice mould that I picked up at a shop some time ago, but I think you can easily get the same result by using a bit of cling wrap and shaping the rice into a ball. Just separate your cooked medium grain rice into two portions, one to be coloured and one to be left plain. Form a rough handful of each into a hemisphere (try to keep them even) and ta-dah, you've got two halves of a ball.

Very complex stuff, this.

I'm fascinated by differently shaped ice cubes. I've also got a tray that'll give the ice cube a jewel-like faceted finish. I'm planning to use it to make fancy looking desserts. 

As for the colour, you can change the colour of the rice by natural or artificial means; from using a few drops of food colouring, to mixing in different coloured ingredients, or by using different varieties of rice which have different colours. In this case I used some tomato sauce to get the red colour and add a bit of flavour, but traditionally, rice balls were only flavoured with salt.

I also decided to be fancy and add some filling (tuna and mayo) but really, anything that strikes your fancy can go in these. Some other ideas for fillings might include pickled vegetables, thinly sliced omelette, or even last night's stir fry (if diced finely enough). If you're adding filling, make a small divot in one half of the Poke Ball and gently pack it in. Don't apply too much pressure when adding the filling otherwise your bottom half might disintegrate. Pop the other half in top, and if using cling wrap, wrap it around and twist the excess to make a tight ball. You're almost done!

I was actually very heavy handed with the tomato sauce (or ketchup for all you readers across the ocean) so my rice balls turned out very tomato-ey. 

And the other half, not as packed tightly as it should've been. 

Fun fact, I had a bit of difficulty removing them from the moulds because in my infinite wisdom, I forgot to grease the tray. Don't despair, because you can easily fix it by gently shaping the ball in your hands. 

The decorations are made with seaweed sheets, or nori, while the white bits were cut from a slice of cheese; mayonnaise completed the picture as the glue holding all the pieces together. I've considered getting a scalpel for more fiddly cut-outs, but a pair of scissors will hold you in good stead here. Just make sure they're clean before using them, and not covered in sticky tape residue and wrapping paper slivers from last-minute gift preparation (as of the writing of this entry, there are SIX more Sundays until Christmas, where did this year go?!)

Cut a roughly 1 cm thick strip of seaweed, a circle of seaweed, and a circle of cheese that's a little bit smaller than the seaweed circle. I cut them freehand with a paring knife, but if you're not the most confident with your knife skills, you can use something as a template. The strip will wrap around the circumference of the ball and hide the join of the two rice halves, so don't worry if it's not the prettiest. The seaweed circle goes on first with either a dab of water or mayo, and then the cheese goes on top of that, fixed in place with mayo. And that's it! A round of applause and pats on the back for everyone, you're now the proud owner of Poke Rice Balls. Bonus points if you eat these while playing Pokemon Go.

As easy as 1,2,3

There are 3 Pokemon here, which will you choose...?


Happy slothing!!
xx


Wednesday 18 May 2016

Fan-Tasty: Undertale's Grillby's Burg

Undertale is a 2015 RPG that is, in the creator's own words, "a traditional role-playing game where no one has to get hurt." Created by Toby Fox, it's amassed a massive following since it's release in September and it's currently available on Steam for PC or Mac.

Without giving too much away, food plays an integral role in the game, acting as a buffer for your health points or HP (similar to most RPGs) as well as providing certain advantages that you'll have to discover on your own or alternatively, watch a play-through on Youtube or read the in-depth Wikipedia. 

I'm a bit late to the party, but better late than never! I fell in love with the soundtrack, characters and dialogue and I was filled with inspiration (or should that be DETERMINATION)? So without further ado, I present Grillby's Burger.

Grillby is a non-playable character in Undertale and he runs a bar in the first town the protagonist reaches, also called 'Grillby's'. It's apparently known for it's greasy fare; and although neither are consumable items in the game, the protagonist is offered either a serve of chips or a burger depending on key events that I won't go into detail here.

(source) Concept art is an amazing thing. Also GRILLBERT.
Burgers and chips complement each other, just like cheese and crackers, bacon and eggs, jam and scones; so when I was faced with the difficult choice of choosing just one or the other, I was slightly disappointed. But the game's the game and this is real life, so we can have burgers and chips if we want to!

Originally when I was drafting ideas, I had the intention of cooking triple cooked chips; it's been something I've wanted to try for a while now. I first came to know of these through watching Heston's Great British Food series where he tries and succeeds with great aplomb to reinvent the humble fish and chips. If you're particularly interested in learning how to cook them and have 3 minutes to spare, you can watch a clip of Heston talking about potatoes here from his 'In Search of Perfection' series. However when I approached mumma sloth about making triple cooked chips, I got rebuked with a resounding 'No way' and a lecture about the nutritional value of deep frying. So, this post will not be featuring triple cooked chips, but I managed to rustle up some incredibly crunchy baked chips instead. Basically it's the same process as following one of those recipes on the internet that tout themselves as 'World's best roast potato' or something along those lines, except cut the potatoes into chip shapes rather than chunks.

The burger patty itself was inspired by the Jucy Lucy (sic) or Juicy Lucy, a variation on the traditional cheeseburger where instead of the cheese being on the top of the patty, it's inside the patty resulting in a cheesy, melty suprise when bitten into. For added decadence, I decided to add bacon, caramelised onion, tomato relish, aioli and a sunny side up egg; but really, go nuts with whatever you want! The recipe itself is super easy and very customisable to your own tastes, so explore different flavours and seasonings, and find something that tickles your tastebuds!

Super basic patty recipe: mince, breadcrumbs and egg
There is no way to take a flattering picture of mince.

So juicy! Be warned the cheese may leak during cooking if you don't seal it properly!

Didn't quite manage to get a photo while the patty was still melty, but still good.

Basically you boil the potatoes until they're on the verge of falling apart, then chuck them in the oven in some oil that's been heated up in an deep baking tray or something; me personally, I'd advise against using a baking sheet because it's shallower and hot oil + skin = ouch. I cooked them at 200'C for maybe an hour, flipping them every 20 minutes or so, or at least until they start turning golden brown. Once you're happy with how they're looking, take them out and transfer to a plate lined with paper towel to absorb any excess oil, then tuck in! 

Friday 29 April 2016

Fan-Tasty: One Piece Gomu-gomu No Cake

Man, oh man, I've been wanting to make something like this for a while. Word of warning, this is pretty text heavy so if you're wanting to skip to the recipe/method because who even has time for that,click here . Those who read on, I salute you.

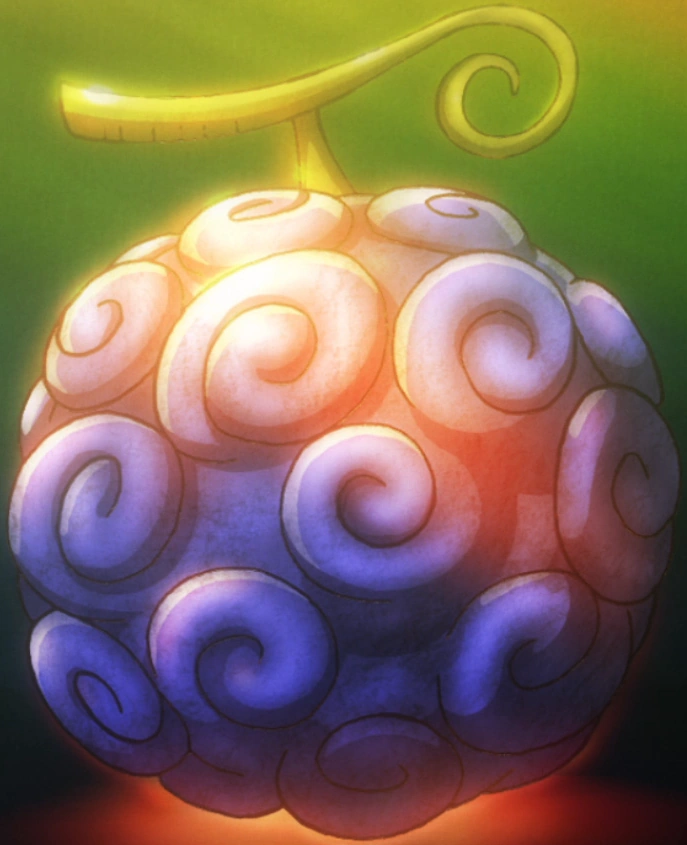
For those of you who are unfamiliar with what exactly this cake is - here's a quick rundown. One Piece is a manga series by Eiichiro Oda that started in 1997, and is still running to this day in Weekly Shonen Jump. It's been collected into eighty volumes at last count and it's still going strong. It follows the adventures of Monkey D Luffy, a 'rubber man', and his pirate crew as they sail the seas in search of the fabled One Piece, the former Pirate King's treasure that he left behind; and in this world, there exist things called 'Devil Fruit' which bestow powers on the person who eats them at the cost of them becoming unable to swim. There are different kinds of 'Devil Fruit' - such as ones that turns the user into animals, ones that give the user the ability to control elements or ones that turns the user into rubber. It's all very interesting and you can read more about the series on Wikipedia, go find all eighty volumes at bookstores or watch the first episode on Crunchyroll here.
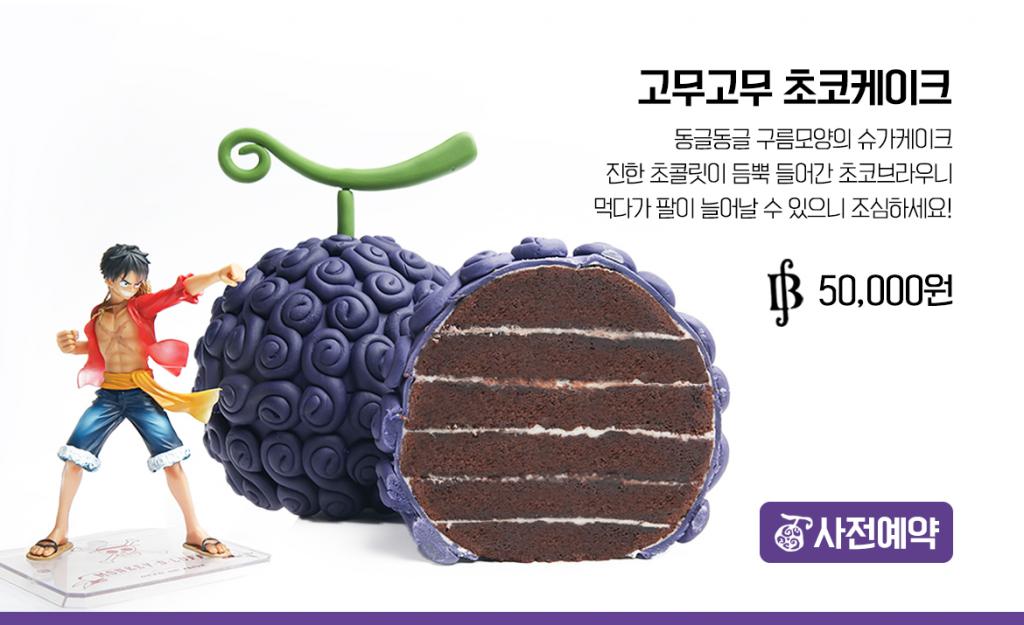
(source) Apt name is apt.

(source) The cake that started it all - Apparently it's layers of brownie cake; the orange one (Mera Mera no Mi) is cheesecake and pound cake.

    
(source)  The Gomu Gomu no Mi (or Gum Gum Fruit if,
like me, you watched the English version on Cheez TV)
 
The Gomu Gomu no Cake, in all it's glory. While looking
up reference pictures for this entry, someone asked me
whilst looking at the picture above: 'Isn't that the cake
you made?' - One of the best fistpump moments I've ever had.

This whole thing was first inspired by an article I saw on Kotaku here about these cakes being available in Korea for a limited run; and I'm a sucker for combinations of some of my favourite things (seen here as anime and baked goods) so my curiousity was piqued. Looking at the pictures, I ran into my first (of many) hurdles. Fondant. It's not that I don't like fondant, per se, but if I can avoid it, I will. I acknowledge that there are many things you can do with fondant that just aren't possible with other icings but I still can't bring myself to cover perfectly good cake with it. Quite possibly, I've just never had good fondant. Which, led me to my second problem - sweetness.

My icing of choice for something like this where I needed to be able to pipe it was buttercream which is basically icing sugar and butter and flavouring. That's it; and for a cake of this size, having to eat that much buttercream in one go would get sickly pretty quickly. In hindsight, cream cheese icing would probably be a good alternative for the outer swirls (maybe I can make the Mera Mera no Mi out of red velvet cake next...hmm); which led me to my third problem - flavours.

The original cake is apparently layers of brownie cake; and that, to me, when coupled with the sweetness of the buttercream, would turn into a mess of sugar. Which although not neccessarily a bad thing was not what I was after.Some of the highlights of my thought process were 'lemon and rosemary cake and earl grey buttercream' and 'coffee and blackberry and whiped cream filling' but I decided to keep it simple, at least for a first attempt, and I went with a coffee flavoured sponge and a chocolate sponge in the hopes that the bitterness of the coffee would balance the sweetness of the sugar. To try and make it more palatable, I decided to go with a coffee buttercream for the inner layers and the outer swirls was a vanilla buttercream. All in all, wasn't bad - was still very sweet but the coffee aftertaste helped.

Once that was all sorted out, the fourth problem reared its ugly head. How do you make a spherical cake without a spherical cake tin? This was the question I asked myself (and Google) and the first, brilliant solution was 'Make two half-sphere cakes, then sandwich together,' on the off chance you have a hemispherical cake tin lying around. I am not one of those people. Looking at the original cake, you can see they've done it in layers so I decided to do something similar. I decided on concentric circles that, once stacked, would magically form a ball shape and got to work. Stand back, we're going to try maths!

Maths.
I decided to wing it instead and eyeball the cake into submission. First I made the sponges in a baking tray to ensure I got the maximum area (which gives you a bit more wiggle room when cutting). Once that was done, I left them aside overnight to cool. Potentially, you could make this in one day if you start the sponges early enough and you use a fridge to expedite the cooling process. Next, I came across the fifth problem, circles. I don't have that much confidence in my knife ability that I can cut a perfect circle freehand so I found a ramekin, a small bowl, a round yogurt lid and a bigger bowl. Innovation is key!

Does anyone remember that tongue twister about making bitter batter better with better butter?
Make sure you have enough cake for the circle with the biggest circumference!

Looked good when it was all separate but...

"Are you making a honeypot cake?"
 Not the most spherical sphere, much to my disappointment. Not to be deterred, I decided to see if a crumb coating would add any improvement. This step's pretty easy, just spread a layer of coffee buttercream in between each layer and build up your cake, then cover the whole thing in a thin layer of icing. Note that it might slide around as you build up the layers, but they can be easily pushed back into place with none the wiser. After the crumb coat had set after about ten minutes in the fridge, it was time to practice my knife skills. I'm sure there's an actual professional way to do this, but I just shaved the sides down until it looked like a sphere. It definitely helped that the cake was hard though, I can only imagine it'd be ten times harder with the layers sliding all over the place - so don't skip the refrigeration step!

Disappointingly enough, the crumb coat did
not magically turn it into a perfect sphere
After carving, it looked so much better - just use
a sharp knife and whittle that cake!

Once it's ball-like enough for you, crumb coat with purple icing then in the fridge it goes; then once that's set, you can apply a thicker layer and then it's on to the fun part. Now, I'm a fan of buying things only they're absolutely, positively neccessary and piping bags fall squarely into that category because I figure I can use a ziplock or freezer bag to the same effect more-or-less. However, last Christmas I was blessed with the gift of disposable piping bags, so I decided to treat myself and use one. Straight away, it was a lot easier to pipe but I think I made the hole a bit too big and my swirls didn't turn out quite as planned. So back to the freezer bag I went, and although slightly more cumbersome to hold, I got a better result. Moral of the story - practice does make perfect.

Once you're satisfied with how it looks, pop it back in the fridge and you can get working on the stem. I definitely remembered the stalk being green but didn't feel up to experimenting with food colouring and white chocolate. Fun fact, did you know you can buy pre-coloured icing/chocolate in tubes - and they have flavours? Mind blown that day in the baking aisle. Of course, I didn't have those on me at the time so I went with dark chocolate; and this is where my perfectionist streak metaphorically gut-punched me. The first time I did the stalk, I was pretty happy until I nudged it accidentally in transit to the fridge. Easily fixed, a bit of scraping and I ended up with a far thicker stalk than intended. Third time's the charm, as they say.

Only, not quite so in this case. I took it out of the fridge a few minutes later, only to see that the chocolate had spread out. Maybe it'll look okay when I stick it into the cake, I thought.

It didn't. I spent a good minute looking at it and thinking 'That looks okay,' but, well, the picture doesn't lie. Fourth time lucky! I melted it down and tried again, and failed again. Third Fifth time's the charm, as they say. With all the focus and steady hands of a neurosurgeon, I finally managed the perfect stalk and I'm so glad I did. In the immortal words of Ron Swanson: "Never half-ass two things. Whole ass one thing."

Triple batch of icing, ready to go!

The crumb coat enables a really clean second layer.

Primary school flashback to space dioramas. Mine was on Mars.

Swirls upon swirls upon swirls.


Yeah, looks just as bad as I remember it looking
Slices just like a rockmelon. Now, who's up for a swim?
Related Posts Plugin for WordPress, Blogger...